It’s not a bad idea to contact your homeowner’s insurance company, especially if the damage is a result of recent storms. They may recommend a roofing professional.
Start with a visual examination. Look for shingle damage, gutters, roof edges and flashing around dormers and chimneys.
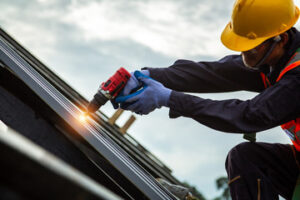
It’s probably best not to do roof repair during a howling gale or torrential downpour. A skilled roofing crew will have the right safety gear and tools to work safely.
Shingles are often the first roof components to be affected by storms and natural wear and tear. Heavy winds, severe hail and snow, prolonged sun exposure, and general age can all take a toll on the integrity of each individual shingle. This is why it’s important to check out your roof annually or after a serious storm, and especially to replace any shingles that become damaged.
Replacing a shingle is a relatively simple task and only requires a few tools, including a hammer, flat pry bar and a handful of 11/4-in. roofing nails. The first step is to see if there are any leftover shingles from the last time your roof was repaired (with any luck, the builder or previous homeowner left some behind). If not, head over to a home center and pick up a bundle of shingles that match the ones you have on hand in both color and size.
The next step is to secure your climbing rope and tie it around a sturdy object on the side of the house opposite the roof you’re working on. Then use the climbing rope to safely climb up and access the area where you want to perform your repair. Once there, test the shingles above and below the damaged one to see which ones are loose. If necessary, gently pry the shingle up and remove its nails.
Once you’ve removed the nail from the damaged shingle, slide the flat pry bar underneath it to break the sealant bond holding it down. This is easier to do in cool weather, when the asphalt sealant spots are less gooey and more easily sheared by a pry bar.
Then carefully lift the shingle up, withdraw the loosened nails and pull the damaged shingle free. After that, simply slide your new shingle into place and nail it to the roof deck. When done correctly, you won’t even be able to tell where the old shingle was. Remember to apply a layer of roof sealant to the top edge of your new shingle, as this helps prevent moisture from penetrating under the shingle and damaging other components of your roof.
Repairing Flashing
Roof flashing may not be the most glamorous part of your roof, but it plays an important role in keeping water out of your home. It seals the joints where different parts of your roof meet, like the valleys or eaves. Leaks can occur in these areas if flashing is damaged or not installed correctly.
Typical flashing damage includes visible rust or corrosion and missing sections. These problems can result from natural wear and tear or from storms that bend or pry the flashing loose from the roof. If you see rust or corrosion spots on your roof, it’s time for a roof inspection and flashing repair.
Flashing can also be prone to leaks, especially when the sealant is cracked or deteriorated. When this happens, moisture can seep under the shingles and into your home. Leaking flashing should always be repaired promptly to prevent further damage.
While you can do many flashing repairs yourself, it is a good idea to consult with a roofing contractor. They have the tools and skills necessary to inspect your roof, remove shingles, and repair the flashing. They can also assess the overall condition of your roof and identify any other issues that require attention.
Before starting any flashing repair, it’s a good idea to remove any debris that is stuck to the surface of your roof. Also, clean the area to make sure that any new caulking or flashing will adhere properly. Lastly, be sure to use a ladder that is sturdy and secure when working at heights.
Start by locating the leaky area of your roof. It is usually easiest to find the source of the leak at the joint where the drip edge meets your roofing material. Carefully pry up the shingle to expose the flashing underneath and check for signs of damage. If the flashing is rusted, corroded, or loose, it should be replaced immediately to prevent leaks and other problems.
If the flashing is around a vent pipe, you will need to remove the shingles covering the flange at the back and sides of the vent. Then, remove the old flashing and replace it with a piece of metal flashing. Nail it where shingles will cover it, and apply a bead of roof cement over the seam to keep water out.
Repairing Built-Up Roofing (BUR)
Built-up roofing (BUR) is an effective roofing system that can withstand a variety of climates and environments. It consists of multiple layers and redundancy, making it resistant to leaks and weather damage. However, these systems require regular maintenance to ensure they remain watertight and durable.
The first step to maintaining your BUR roof is preparing the surface for repair. This involves removing all aggregate, loose surfacing, debris, and any contaminants from the surface. The surface will also need to be thoroughly cleaned and scrubbed. Once this is complete, a patch of BUR membrane should be applied to the area in need of repair.
BUR roofs can be built on concrete substrates, and don’t use fasteners like many single-ply roofs. A base sheet is applied to the concrete, and then a layer of felt or ply sheets is placed on top of it. Several layers of bitumen are then applied to the ply sheets, and a final layer of crushed gravel or glass-fiber is placed on top.
A disadvantage to BUR is that the material is quite heavy. This can make the installation process take longer than other types of roofs, and it will also increase the cost of labor. Additionally, these systems can be vulnerable to cracking and leaking due to imperfections in the materials or weather conditions.
If you have a BUR roof that is leaking or showing signs of damage, it’s important to have it repaired quickly. This will prevent the problem from getting worse, and it can help to extend the lifespan of your BUR roof.
There are a few different options for repairing a BUR roof, including re-saturating the tar and gravel, or replacing the entire surface. These methods can be expensive and may not provide the aesthetic options some building owners or architects are looking for. Another option is to consider a silicone roof coating system, which can be a more cost-effective solution.
If you have a built-up roof on your commercial property, it is essential to maintain it regularly to maximize its lifespan and performance. A facility management software solution like Q Ware can assist with this, by automating inspection and maintenance scheduling, ensuring that all the different components of your BUR roof are getting the proper care they need.
Repairing Soffit
Soffits are designed to maintain airflow between the attic and the roof overhang, preventing moisture buildup. They also help keep your gutter system functioning correctly and directing water away from the structure of your home. Because of their importance, it’s essential to check your soffit regularly for any signs of damage or wear.
Peeling paint, the appearance of rot or mildew, and separation between materials are common indications that your soffit needs maintenance or repairs. Keeping your gutters and roof free of debris, especially during rainy weather, will also minimize problems with your soffit.
A soffit is often made from wood, but can be metal or vinyl. It’s installed underneath the eaves and runs along the side of your roof overhang. It’s often used to direct water away from the fascia and protect it from rot and other elements.
If you’re unsure whether or not your soffit needs to be repaired, you can always try a quick and inexpensive inspection from the ground. Use a ladder to walk along the eaves of your house and look for any sections that are missing or damaged. Be sure to check for rot, insect damage or water leaks as well.
Another easy way to determine if your soffit needs repair is by tapping it with a hammer. If it sounds hollow, it’s likely rotting and will need to be replaced. Inspecting your soffit on a regular basis will help you identify and fix any issues before they become worse, which can save you money in the long run.
Many homeowners clean their gutters every spring and fall, which is an excellent time to perform a detailed visual inspection of the soffit and fascia. You should check for any damage or rot and make note of any wasp, hornet or bee nests. These pests will often choose to build nests in a dry, dark space like your attic or under the eaves of your house. Be sure to call an exterminator if you find any wasp or hornet nests in your gutters or on your soffit.